
The process of building a social platform used to be close to impossible due to the fact that everything from design to creating the databases had to be done manually. In other words, everything had to be built from the ground up. The BuddyPress WordPress plugin makes things easier by handling many of the steps required to create and manage a social network.
From a functional point of view, the plugin adds several features that can be mixed and matched in order to create a fully customized network.
This tutorial will guide you through all the steps necessary to set up BuddyPress and install a compatible theme. The entire process only takes 30 minutes and is easy to follow even if you have no technical skills or programming knowledge.
Step 1 – Installing a WordPress Theme
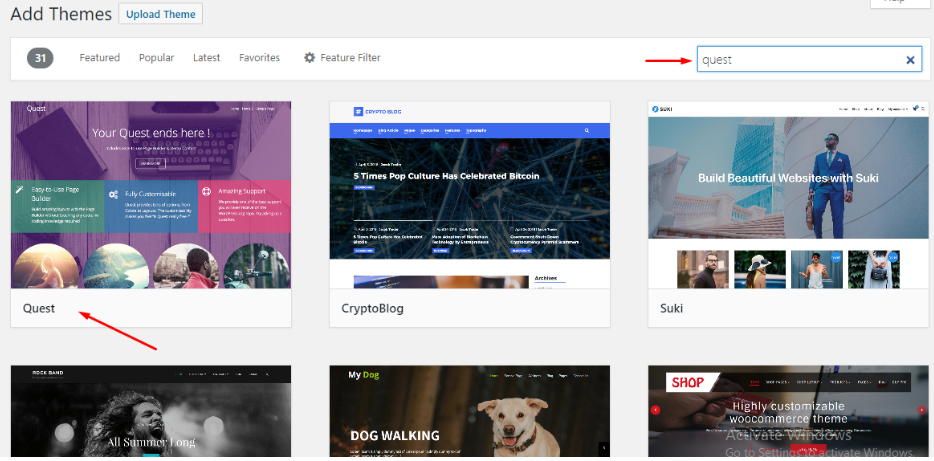
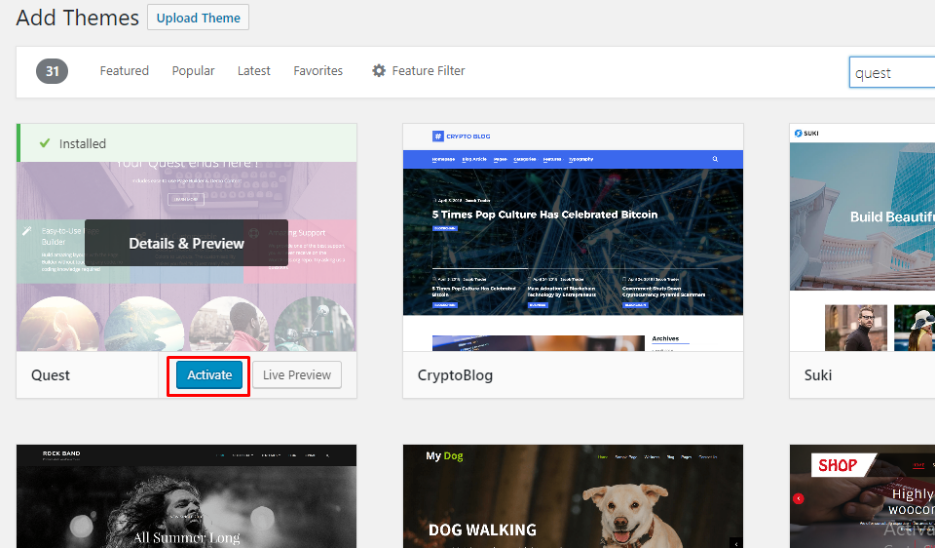
The first step is to install a WordPress theme. This process is extremely simple and there are no restrictions to what theme you can use.
Simply click on the Themes tab in the Appearance menu and choose one of the many themes that are available to you. You can search for specific themes using the search bar positioned in the upper-right corner.
Step 2 – Installing the BuddyPress Plugin
This can be done by navigating to the WordPress Admin Panel, selecting Plugins→Add New. Now, search for BuddyPress by using the search box in the upper right-hand corner.
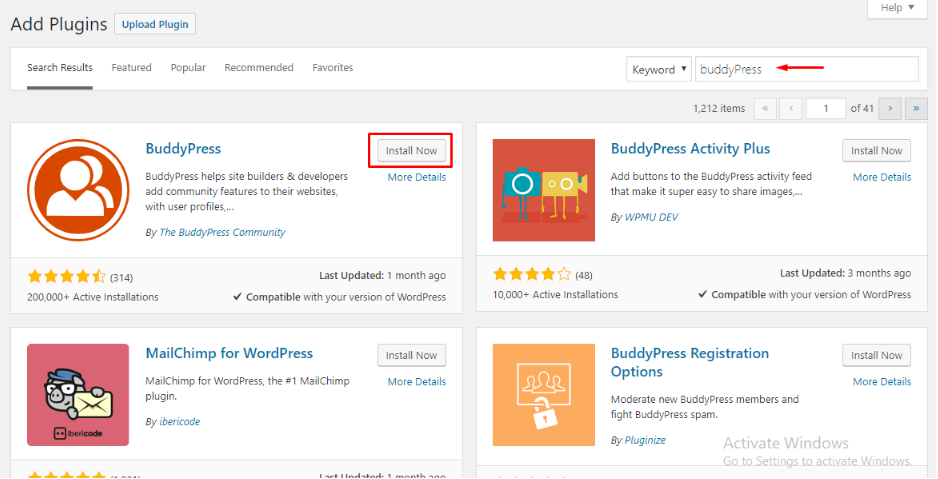
Once you’ve found it, click on Install Now, and then on Activate. This will complete the installation of the plugin.
Step 3 – How to configure the BuddyPress Plugin
The configuration process is relatively simple. Go to Plugins → Installed Plugins → BuddyPress → Settings. The WordPress interface will look like this:

Once you click on Settings, several tabs will appear:
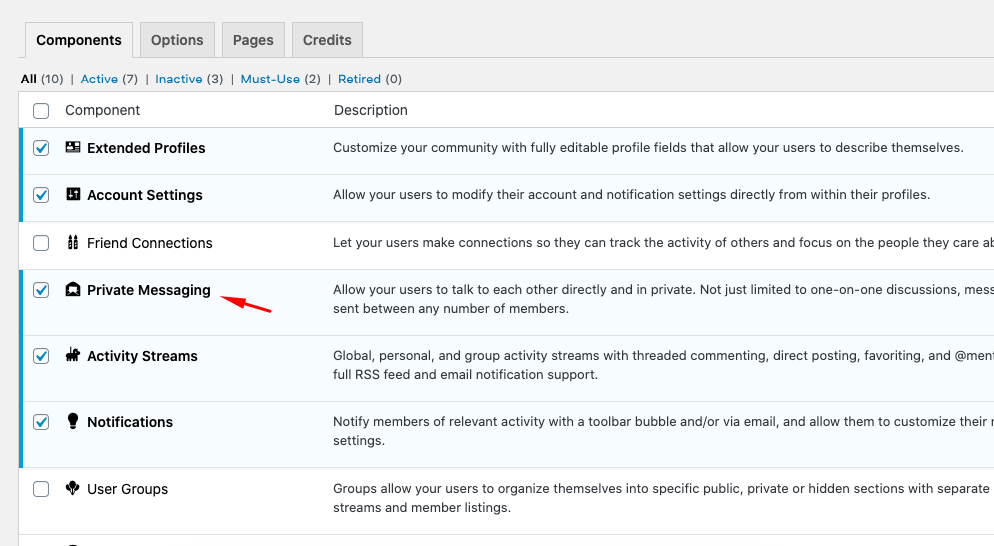
- The Components tab
Here, as an Administrator, you are able to modify options that have a direct impact on how users will interact with individuals from other social networks.
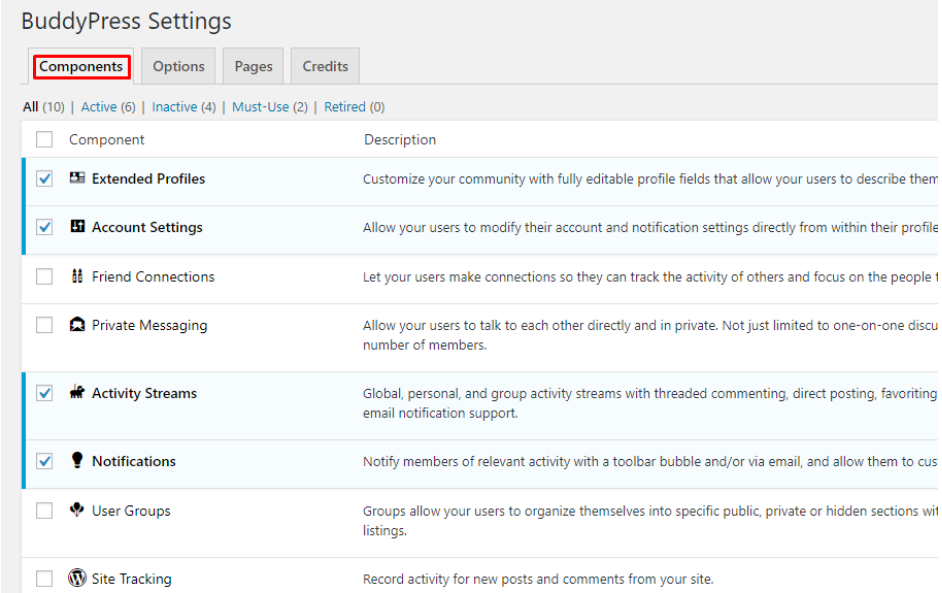
- Extended Profiles – Enables you to add custom fields to user profiles;
- Account Settings – Permits users to change their accounts and notifications from their profile screen;
- Friend Connections – Required to allow users to send friend requests to users from other websites. This also enables the Activity Log that shows users what friend requests have been sent or accepted;
- Private Messaging – This enables private and group messaging for all members;
- Activity streams – Enabling this will permit users to see other user’s activities on the website. This includes streams, comments, mentions, direct posting and others. The notifications are sent by email;
- Notifications – This enables instant notifications for the activities mentioned above;
- User Groups – Enables users to create public, private or hidden groups;
- Site Tracking – Records new posts and comments;
- The Options tab
The options here enable or disable various actions that users can take on the website.
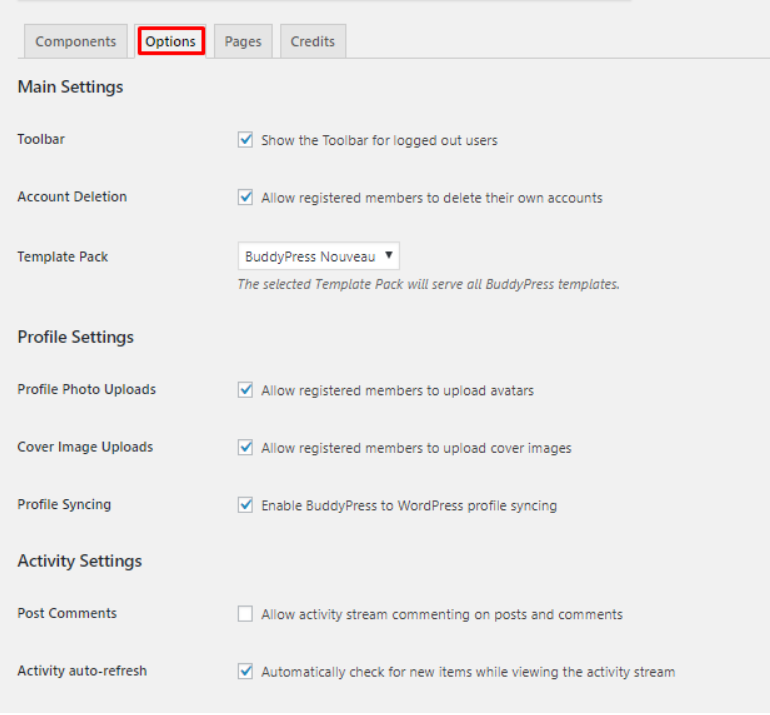
Most of these are self-explanatory, however, there are a few that aren’t particularly clear:
- Activity auto-refresh – This is useful to activate. It automatically refreshes news feeds so that users do not have to manually refresh the webpage;
- Profile Syncing – Enabling this will allow users to sync their WordPress profiles with their BuddyPress ones;
- Post Comments – This allows users to add comments to posts and on their activity stream;
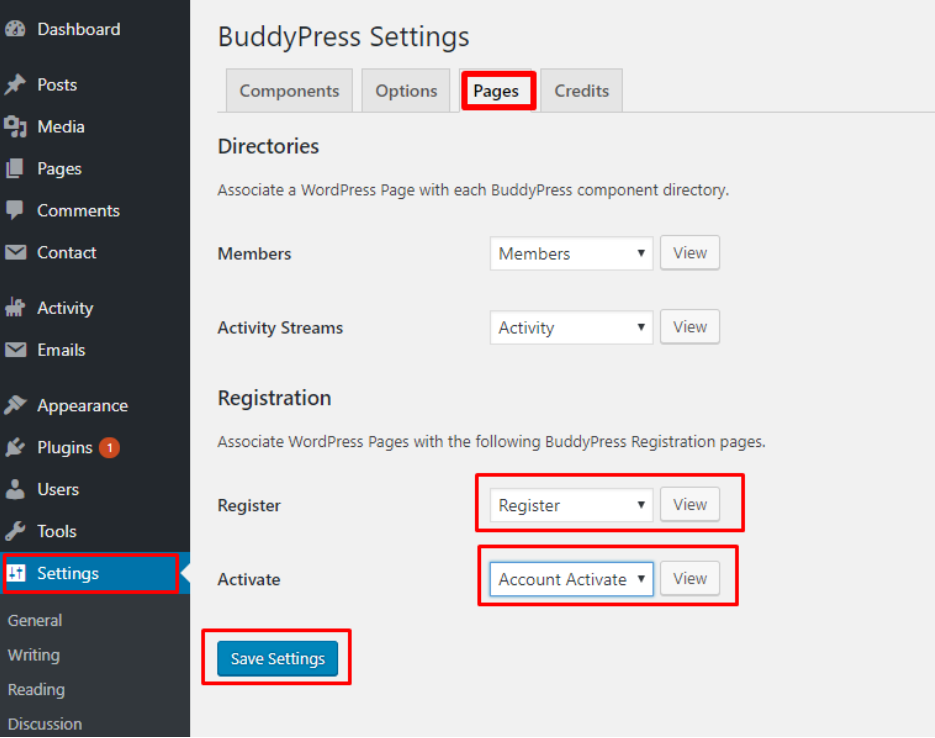
- The Pages tab
This is the true command centre of the entire social network.

Here you will be able to allow members to register and to access various sections of the platform. These are easy to understand, however, enabling the Registration Page requires a few more steps:
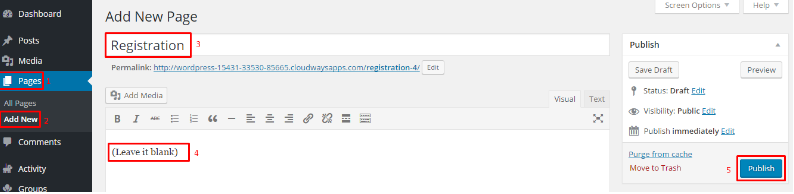
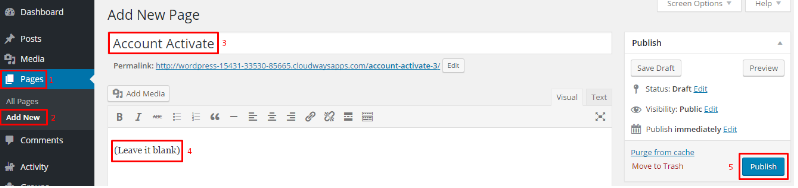
Creating Registration and Activation pages
In order to allow users to register, a new page must be assigned to BuddyPress in order to display the Signup Form. Furthermore, another page will have to be assigned for Account Verification. Here is what you need to do:
Registration – Go to Pages, and click Add New.
Account Activation – Create a second page following the instructions below.
Activating the settings
Next, go to Settings, click on BuddyPress, and then Pages
If the options below “Register” are not visible, you must go to General, in the Settings menu and check the box “Anyone can register”.
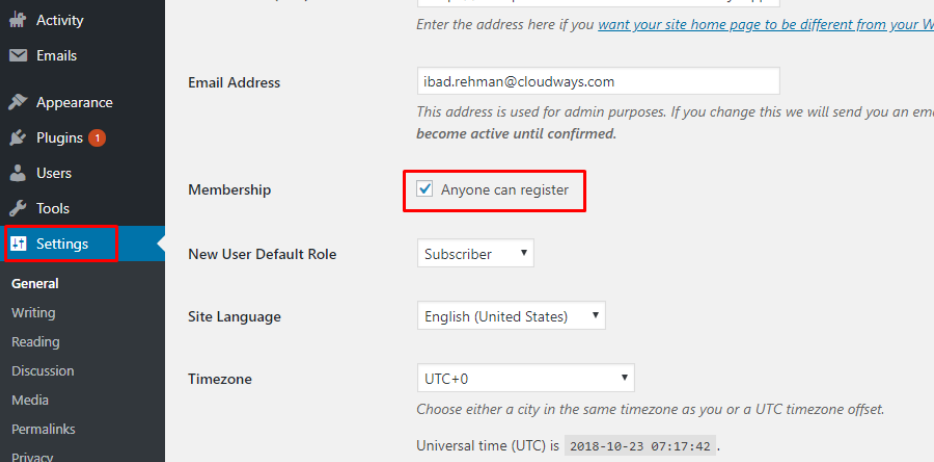
Once you’ve done this, click on “Save changes”.
Step 4 – Using the BuddyPress Plugin with your theme
By going to Appearance→Menus, you will be able to open the Screen Options.
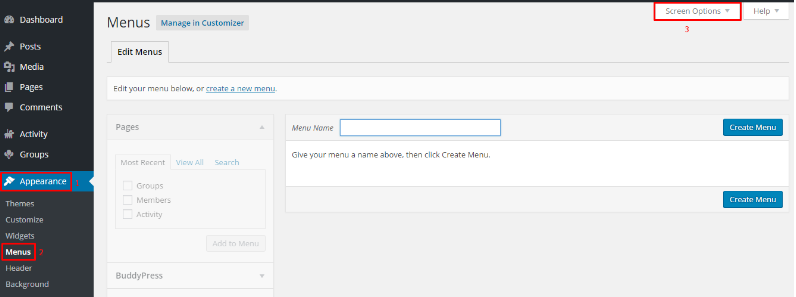
Before clicking on this option, make sure that BuddyPress is selected as shown below:

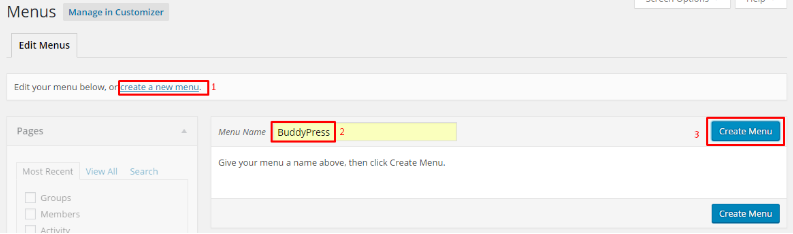
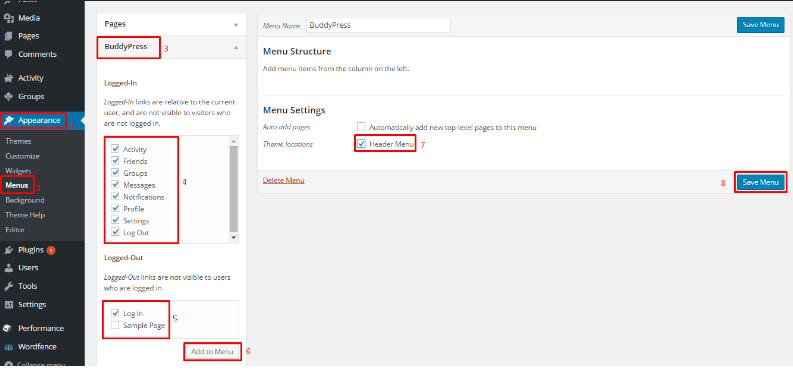
Step 5 – How to Create a Menu for the Navigation Bar
Before moving forward, delete any other menus that you might have. Next, select Create a new menu, and enter BuddyPress as its name:
A new interface will open that will allow you to customize your new menu. Select the options presented below:
Next, go to Widgets and remove any default theme widgets that you might have:
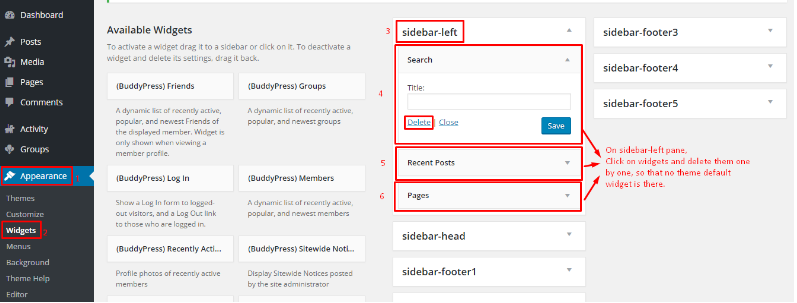
Lastly, add whatever BuddyPress Widgets you may need, to the side menu.
Step 6 – How to allow users to register?
Turning on the registration process is extremely simple. You need to go to Settings→General and select Anyone can register.
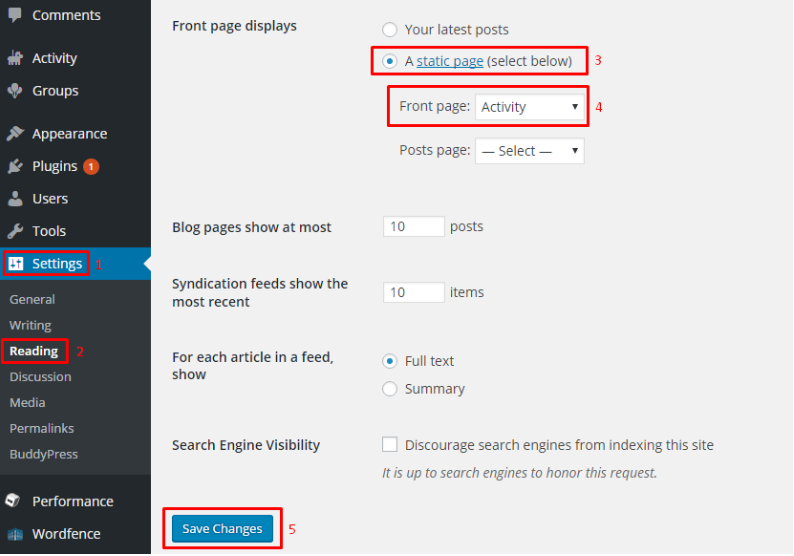
Step 7 – Creating a Front Page
The last part of the process is the creation of a front-page that will be displayed to newcomers. In most cases, the best choice for a front-page is the Activity Page. This can be set by going to Settings→Reading:
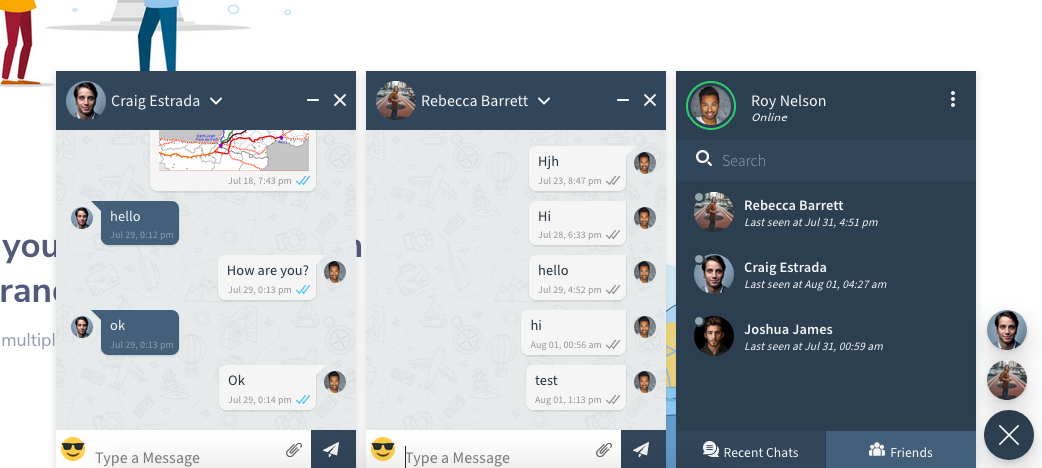
Better user chat
“There is also a BuddyPress communication module that you can enable from the Settings menu, by clicking on BuddyPress and then enabling the Private Messaging feature. This will allow users of the platform to communicate with each other using a basic private messaging system.”
The chat widget looks plain and simple.
“Those interested in offering a more enjoyable user chat experience will find that they can do so by using the BuddyPress chat plugin. Our teams, at WPVenus, have designed the plugin to improve both the functionality and the appearance of the stock chat experience, making it similar to what you would find on Facebook and other similar platforms.”
If you want to give it a try, here’s a demo link.
Overview
These are all the steps required to create a fully-fledged social network using BuddyPress. The whole process only takes 30 minutes and does not require any technical skills. All the features of the plugin are properly explained and easy to understand.