
When it comes to WooCommerce, Simple Products are the most common and the easiest for beginners to understand. The term refers to a stand-alone, physical product that must be shipped to the buyer.
Although the WooCommerce system has been designed to the entire process as easy as possible, setting up and managing a simple product for the first time is not complicated; however, having a guide always makes things easier. This is having been said, here are the required to add and manage a simple product:
Adding a Simple Product in WooCommerce
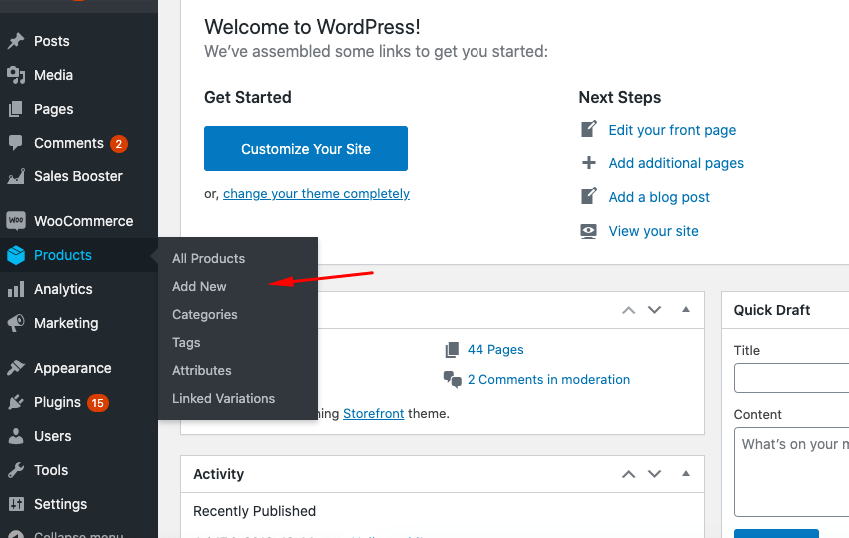
Adding a simple product is easy. Go to the “Products” menu, and click on “Add New”.
This will open up an interface that will help you configure the product listing. Here, you will be able to enter the name of the product, its description, enter it into a product category, and select various tags to make it easier for buyers to find.
The next step is entering the Product Data. The information that you enter here is internal and is required to set up the WooCommerce listing. You can find the fields that have to be filled out at this point by simply scrolling down.
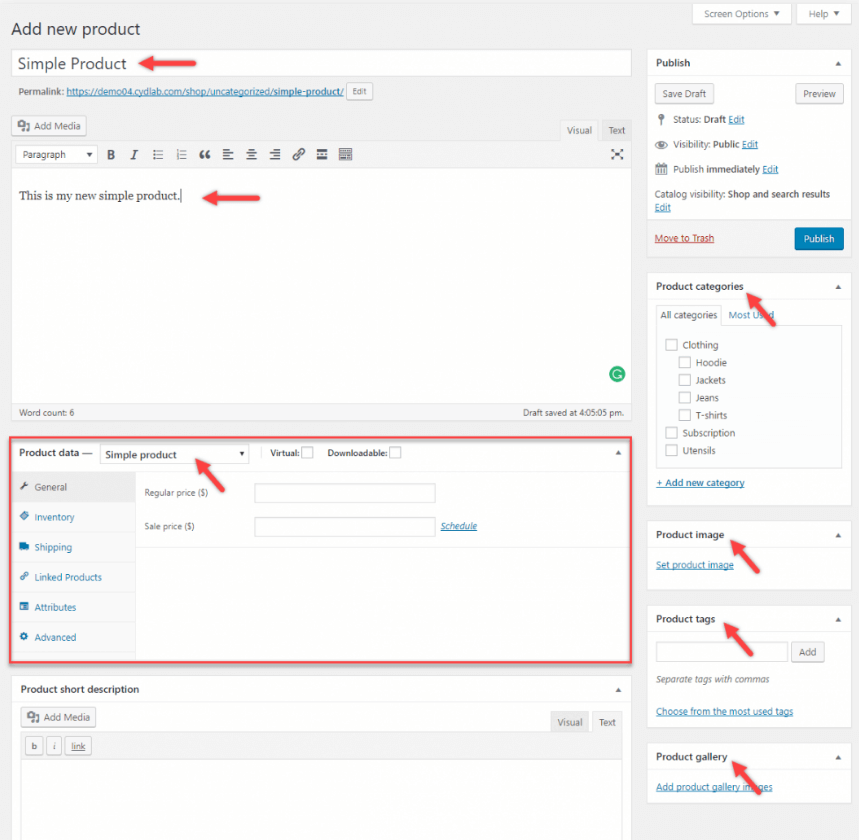
Select “Simple product” from the Product Data menu, and enter the requested information. This usually only requires that you enter the regular price of the product, the sale price, whether or not it is taxable, and the tax class. Users are also able to specify if the product is downloadable or virtual, as well as the SKU for each type of item.
Managing Simple Products and their inventories
Now that the Simple Products have been added to the WooCommerce platform, it is time to manage their inventories. This process is equally simple, but it does require a bit of guidance to save time.
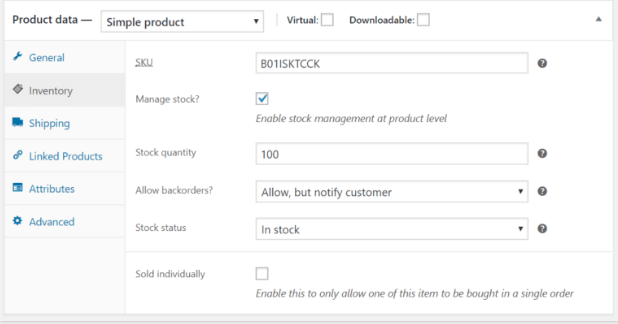
Managing the product itself is done solely from the Product Data menu, “Inventory” section. Here you can modify information such as:
- Inventory – Allow the stock of the product to be tracked by WooCommerce;
- Stock quantity – Specify the currently available stock for the product;
- Availability – Specify if the product is in stock or not;
- Allow back orders – Choose one of several backorder options;
- Sold individually – Specify if customers can purchase more than one product per order;
Please keep in mind that if you have a variable product that you want to manage, it is better to manage its stock at a variation level, instead of a product one. This will allow your shop to constantly know how many products there are available overall.
On the other hand, managing a variable product at a Product Level can have certain advantages. For example, those who are selling products with variations that come from the same stock may be able to get a clearer picture of the available stock. However, this is only useful if the products share the same basic stock and do not come from multiple manufacturers or suppliers.
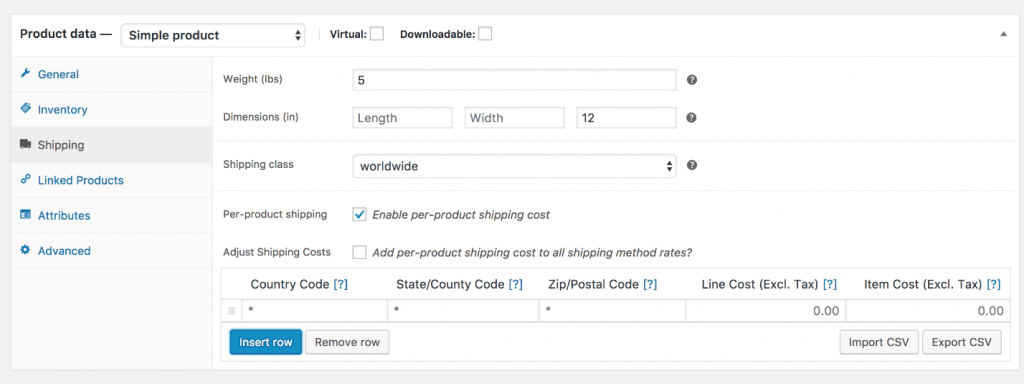
Setting things up in the Shipping tab
The next tab that you will need to look at is Shipping. Here, you will have to specify various shipping-related characteristics of your products, such as the weight of a unit, its dimensions, as well as where you are willing to ship to in the world. Furthermore, you will have to specify if customers will have to pay per-product shipping costs or per-order ones.
The lower section of the page contains a table that enables you to enter shipping details and costs.
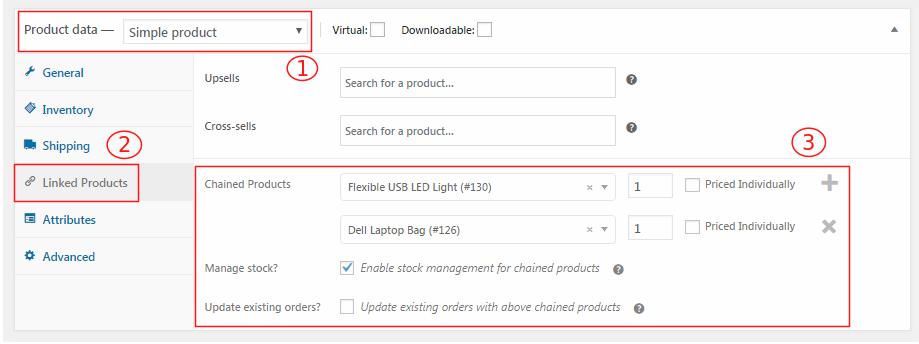
Using the additional functionality offered by Linked Products
The Linked Products tab (2) will allow you to use various marketing strategies to increase sales. These work great for Simple Products (1). Once you click on the tab, you will be presented with a simple form (3) that allows you to link products to make them more visible.
- Upselling products – When a customer looks at a listed item, he will be presented with a recommendation for a more expensive related product;
- Cross-selling products – This works like upselling, with the exception that the visitor will receive recommendations for complementary products, not more expensive ones;
- Chained products – By chaining products, you can link them together as suggestions and discount packages. For example, if a customer looks at a computer, the system can be set to suggest a monitor and to offer a discount for the entire deal or one of the products;
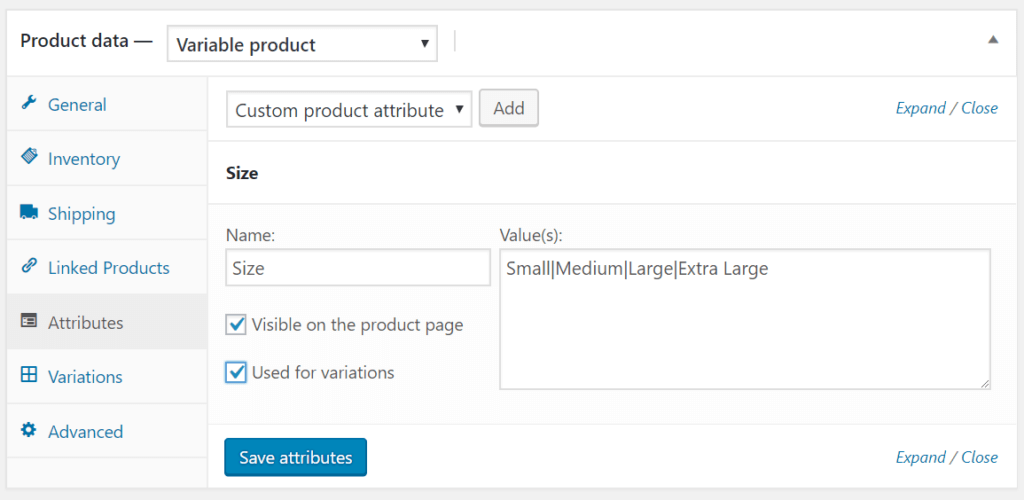
Set the Attributes for your products
The Attributes tab a form that enables you to enter additional details regarding the products. The menu is highly customizable and enables the store owner to set several important characteristics to products. These will serve as tags for filters. Everything from the name of the attribute to its value can be customized. Furthermore, these attributes can be internal, making them useful when grouping variations of products, or they can be public. The latter option enables potential customers to browse through specific types of products.
Understanding the features in the Advanced tab
The last tab that you have at your disposal is the Advanced features one. This allows store owners to add purchase notes, enable customer reviews for their products, and set menu orders. As with the other options, everything is completely customizable and straightforward.
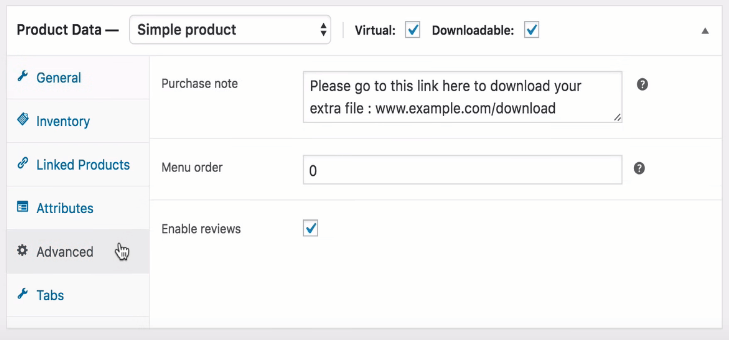
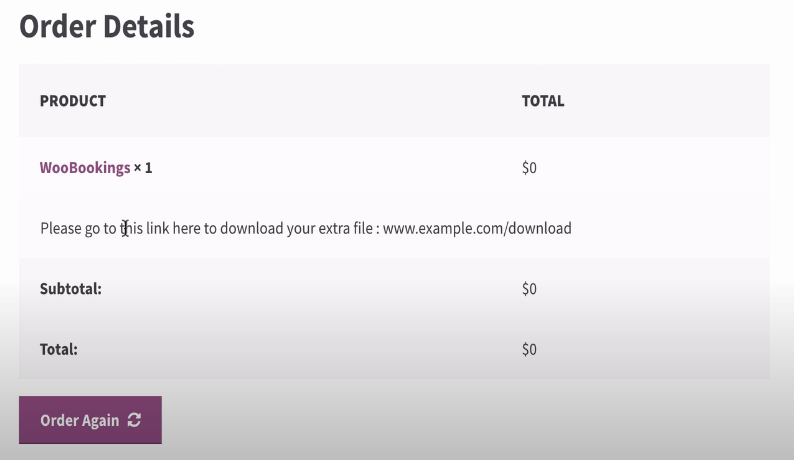
Purchase notes are messages that customers will receive after buying a product. They can contain anything from promotional content to instruction on how an item should be used. Please keep in mind that these messages will be displayed on the order details screen, which means that the customers will have access to them only paying for the product. Furthermore, they will be able to open their order history and recheck the message if they need it.
Overall, all the settings required to create a Simple Product and manage it are relatively easy to understand. Each of the form fields that must be completed has explanations attached to them to make it easier to keep track of what each of them requires from the seller.